WooCommerce is a WordPress plugin that turns a WordPress site into a fully functional eCommerce platform. The plugin is hosted and managed entirely by merchants within their chosen environment.
To enhance the payment experience, our Xendit-WoCommerce plugin can be installed on your WooCommerce store to provide secure online payment capabilities. This plugin will allow you to accept a wide range of payment methods through Xendit with minimal configuration effort.
Follow this guideline to start integrating Xendit with your Woocommerce platform.
Requirements
Before integrating Xendit with WooCommerce, ensure the following requirements are met:
System Requirements:
WordPress version: 4.8.3 or above.
WooCommerce version: 3.1.2 or above.
PHP version: 7.0 or above.
Ensure cURL with OpenSSL is enabled by your web hosting provider.
Xendit Account Setup:
Register for a Xendit account and retrieve your test and live API keys.
Remove any IP whitelist from your Xendit dashboard.
Have Admin or Developer access in the Xendit Dashboard.
You do not need to set up a callback URL in the Xendit dashboard; the WooCommerce plugin automatically handles this.
Plugin Installation:
Download and install the Xendit WooCommerce plugin here.
By completing these steps, you’ll be ready to integrate and start accepting payments with Xendit on your WooCommerce store.
Installation
Go to your WordPress dashboard and go to “Plugins” tab and click on “Add New”.
Type “WooCommerce - Xendit” on the search bar.
Install the plugin.
Go to “Installed Plugins”.
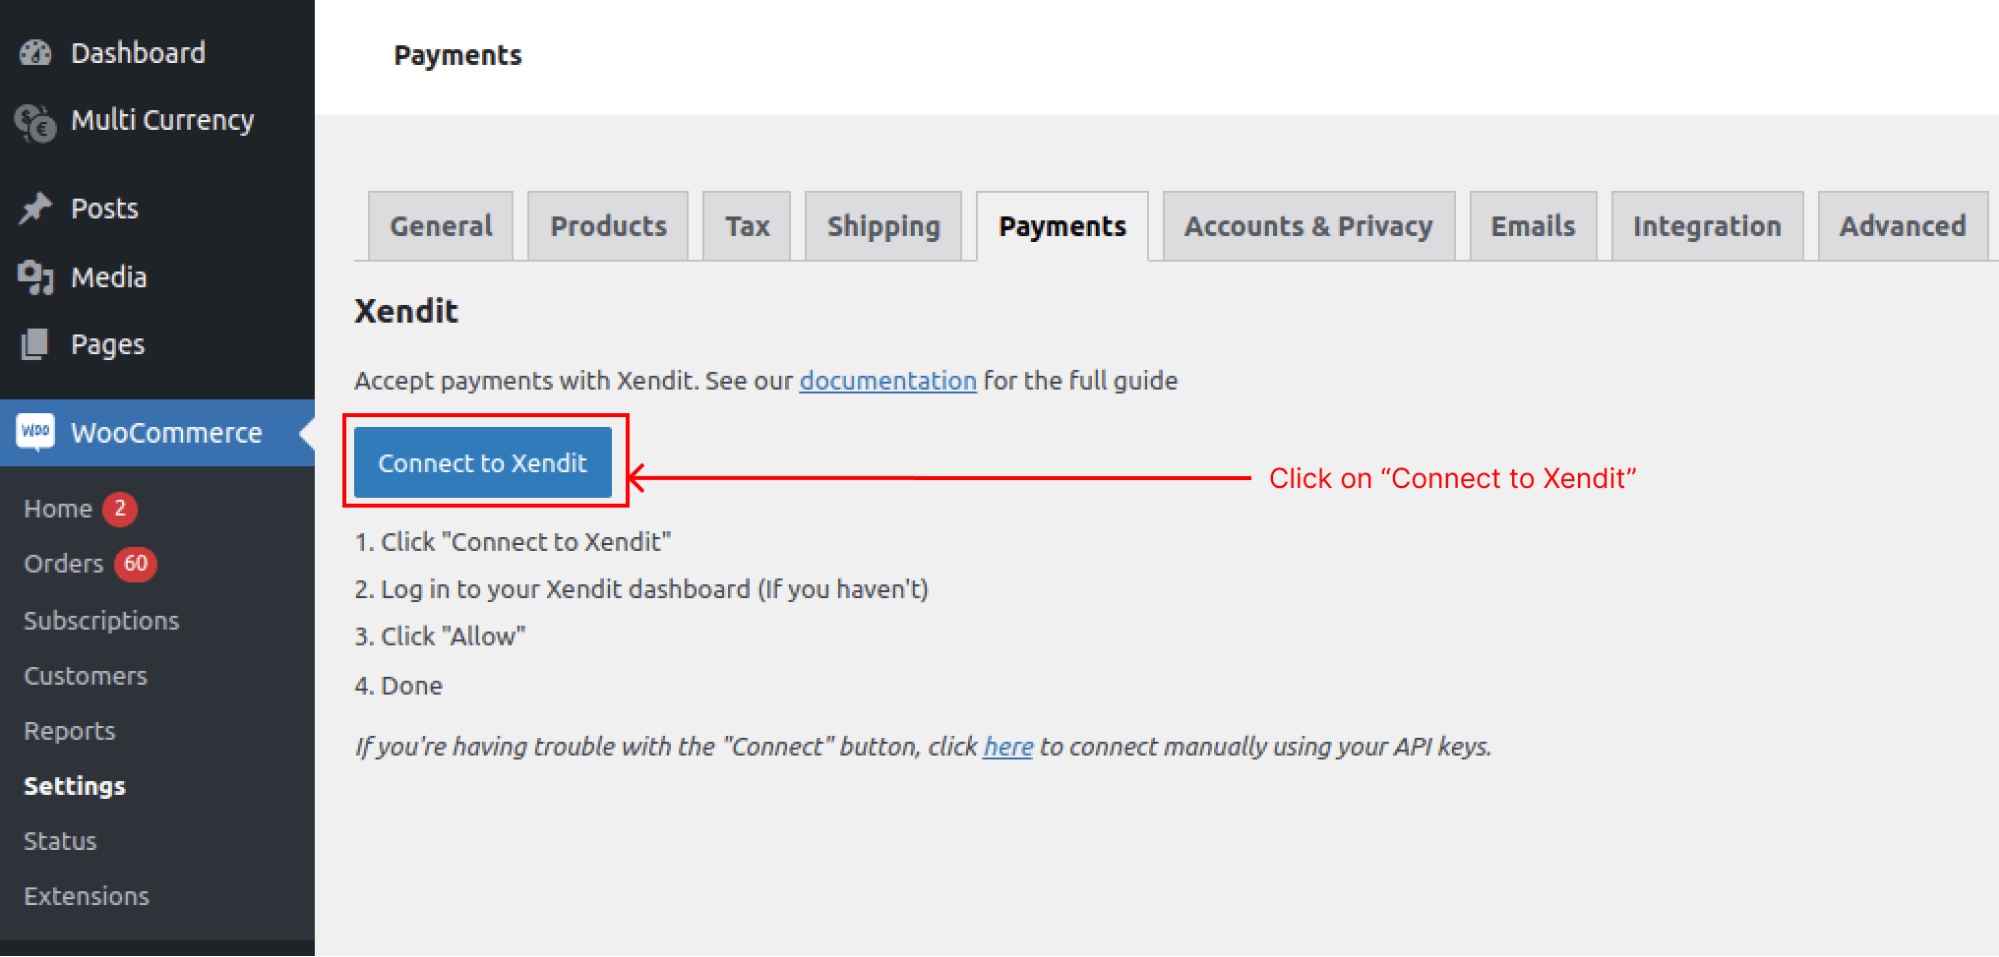
Activate WooCommerce - Xendit plugin and click on Settings

6. Click on the “Connect to Xendit” button
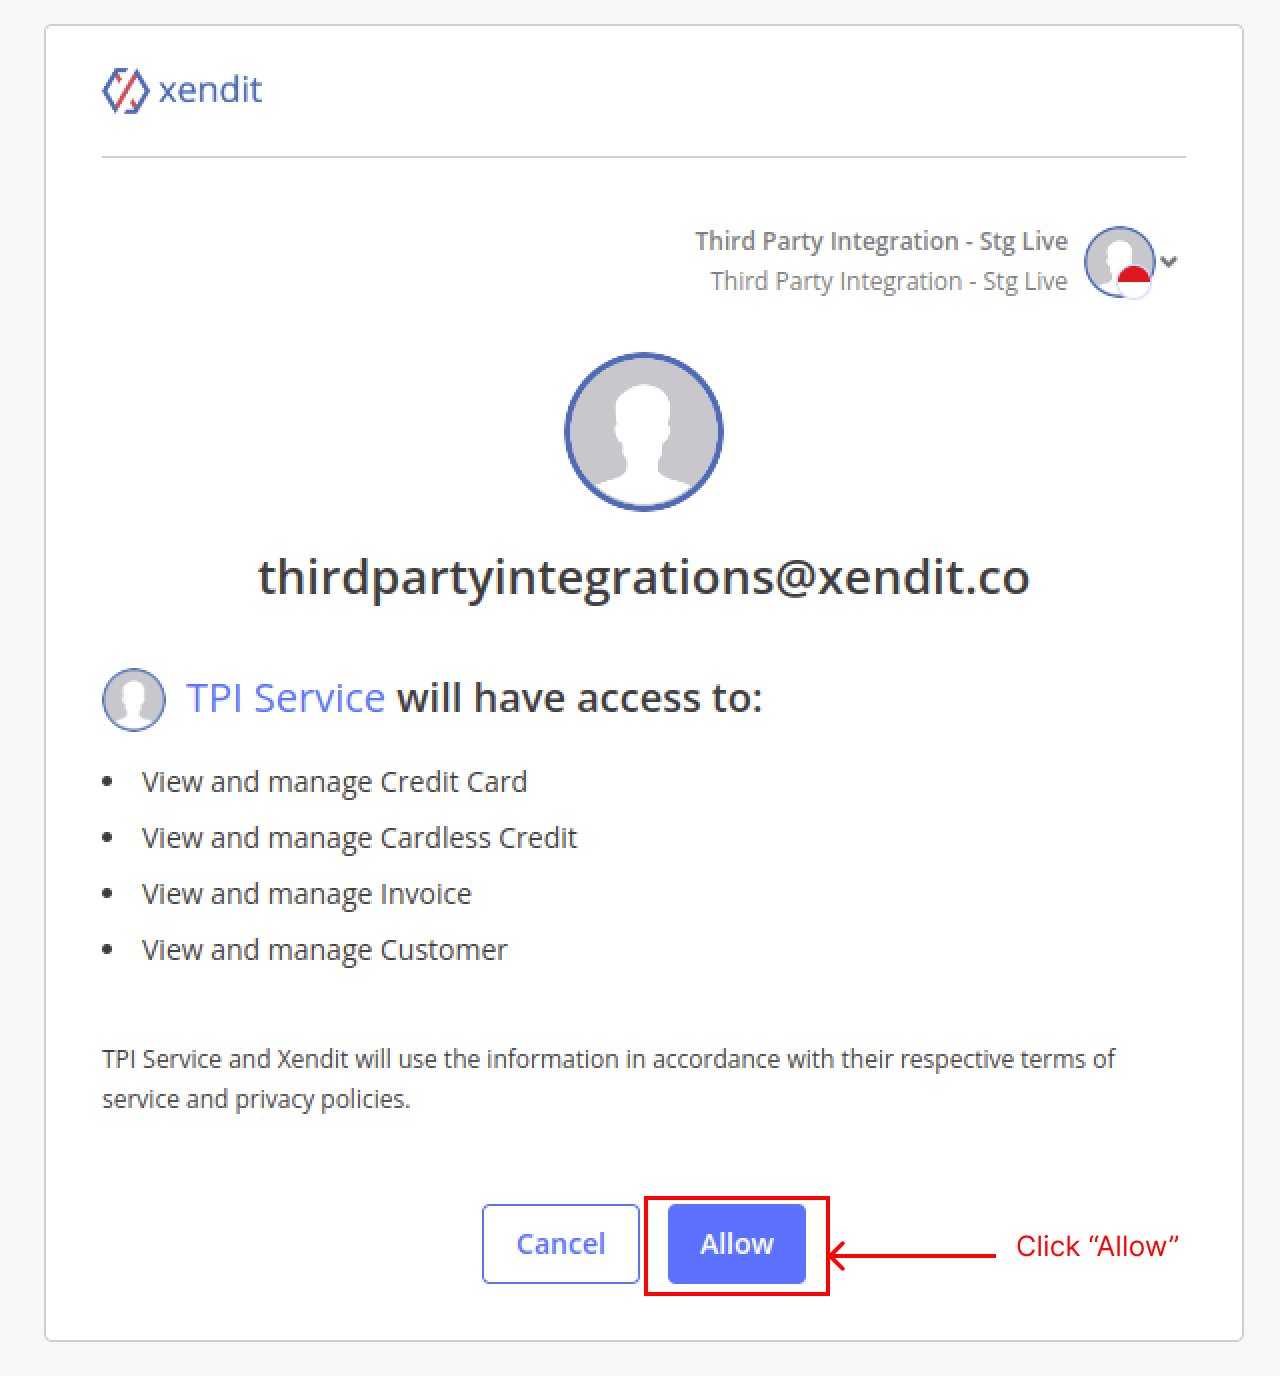
7. Make sure you’re logged in to the right Xendit account, then click on the “Allow” button
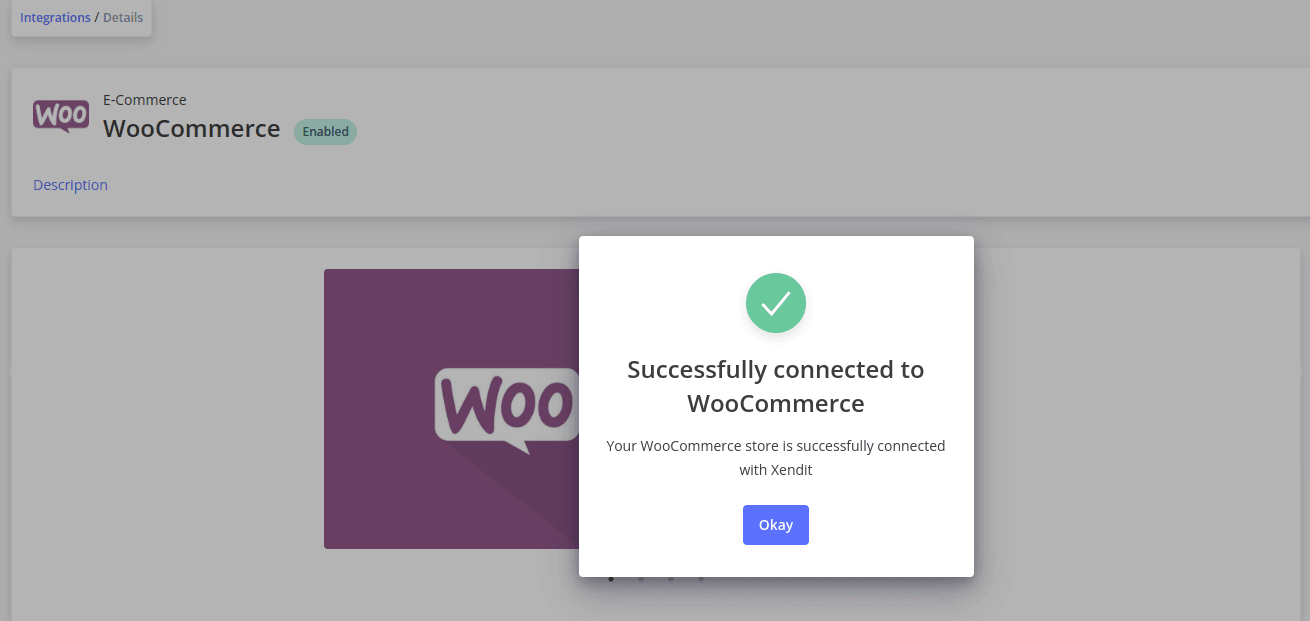
8. You will be redirected to a success page in Xendit Dashboard
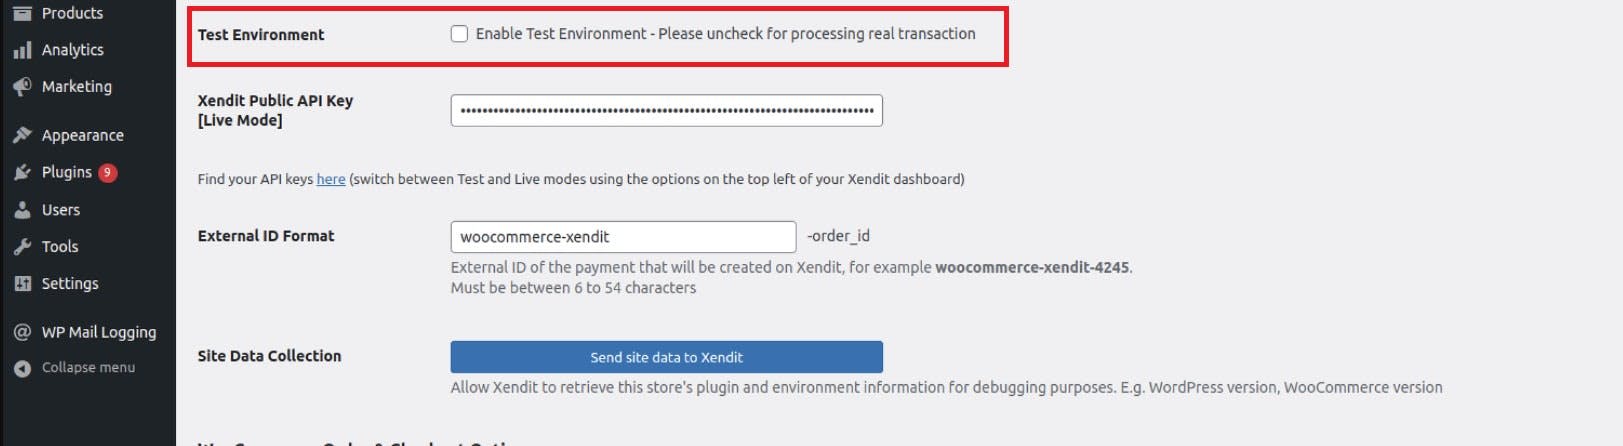
9. You may reload the Settings page on your WordPress dashboard. If you want to use Test Mode first, you can tick the “Enable Test Mode” checkbox. If you want to use Live Mode, please do otherwise. Don’t forget to click “Save Changes” in the bottom of the page
10. Done
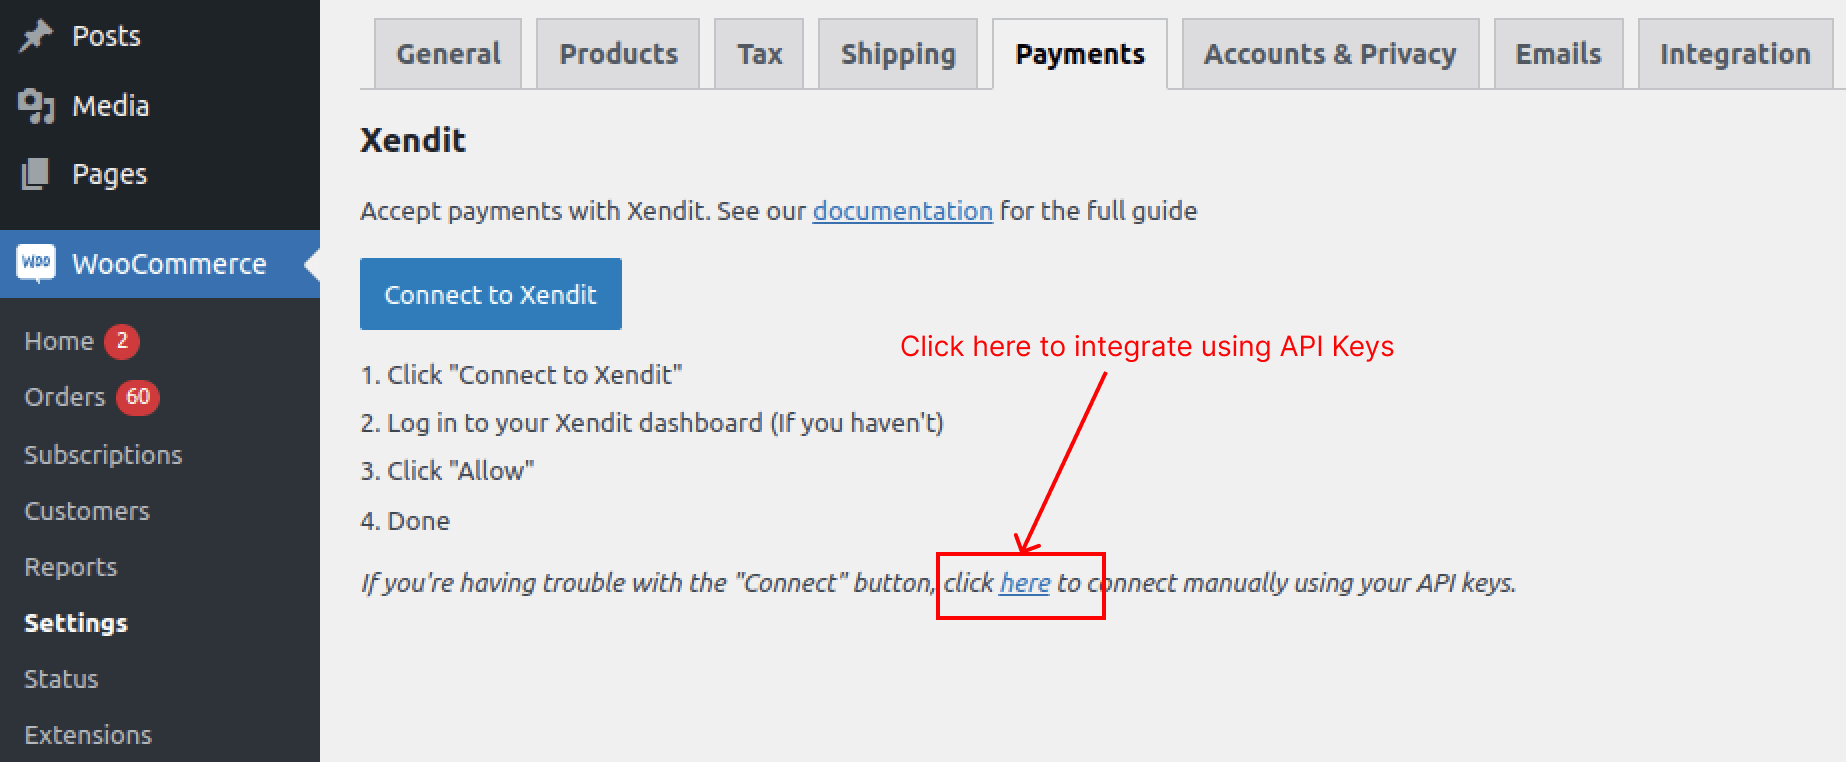
If you have trouble with the installation using “Connect to Xendit” button, please follow this workaround:
1. Instead of clicking “Connect to Xendit” button, hover to the remarks below and click the link attached to integrate using API keys
2. You will be redirected to this page, where you can enter your API keys. Click the attached link in the image below to find your Public and Secret API keys from Xendit
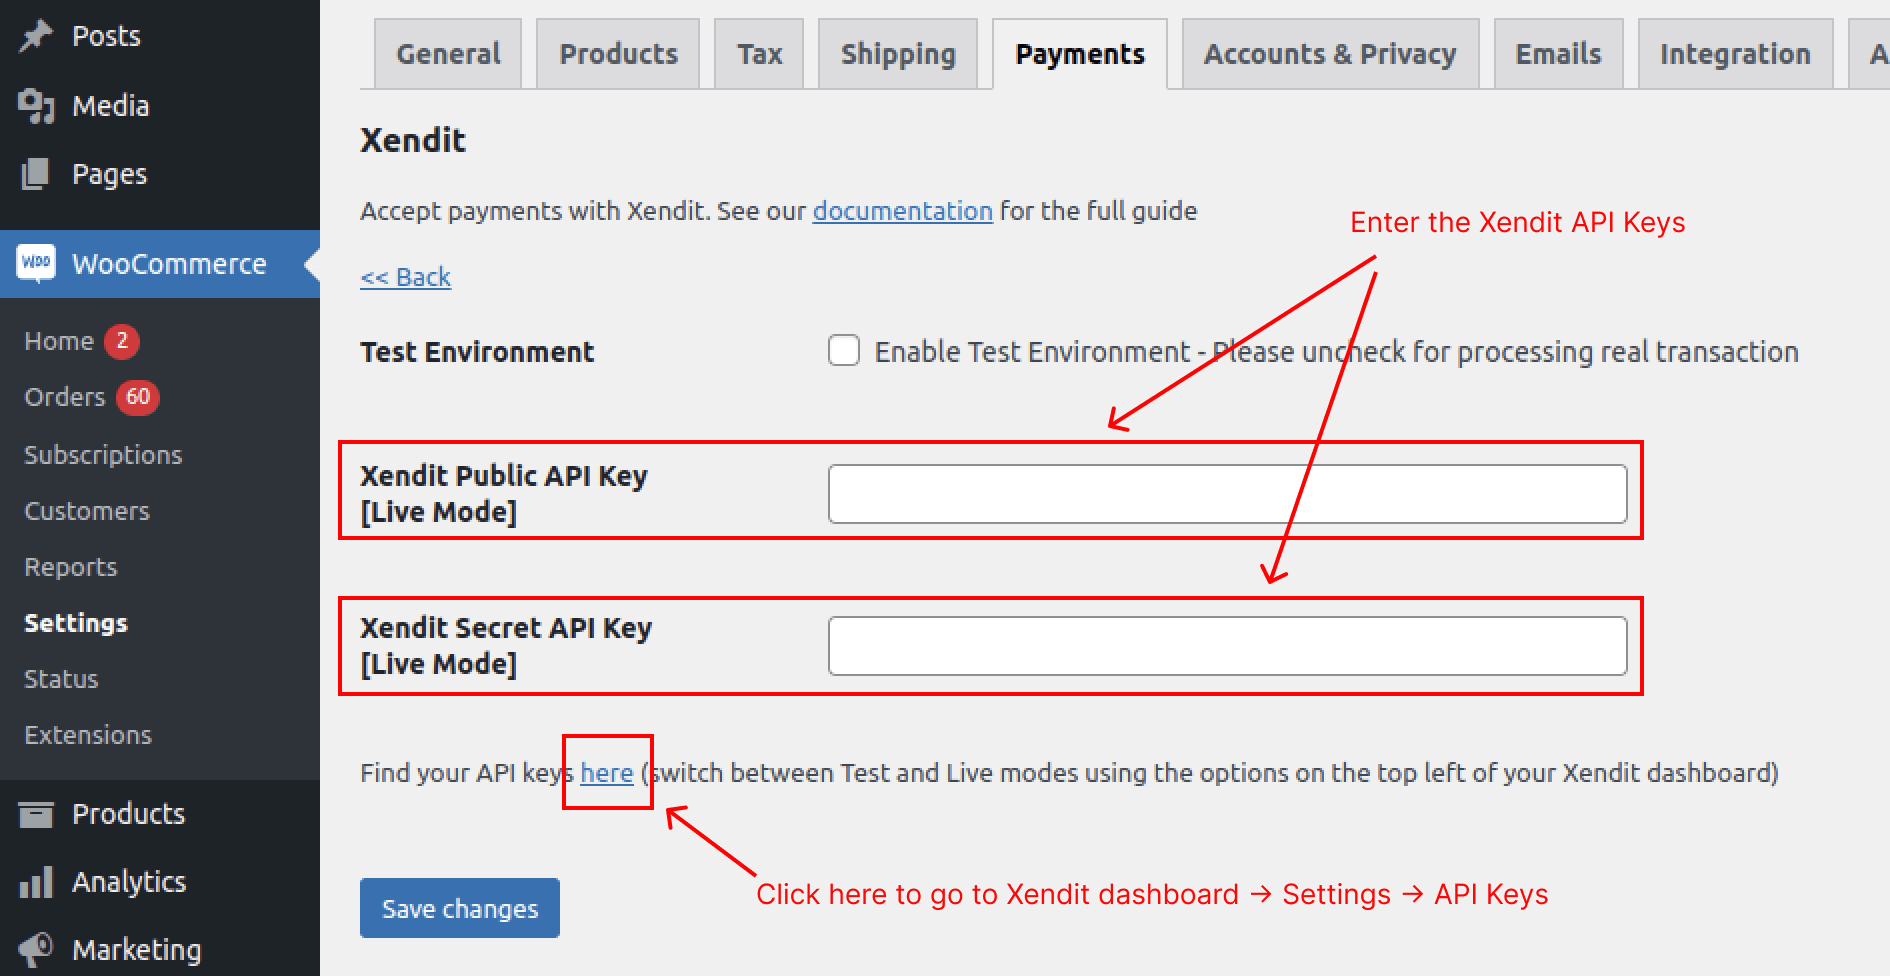
3. Copy the Xendit public API key & secret API key.
4. Paste it in your WooCommerce settings.
5. Click “Save Changes” on the bottom of the page
6. Done
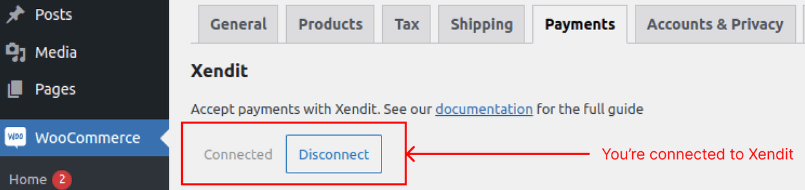
Here are some ways to check whether your installation is successful or not:
1. In the WooCommerce-Xendit settings page, you will see “Connected” button is grayed-out, and “Disconnect” button is available to be clicked
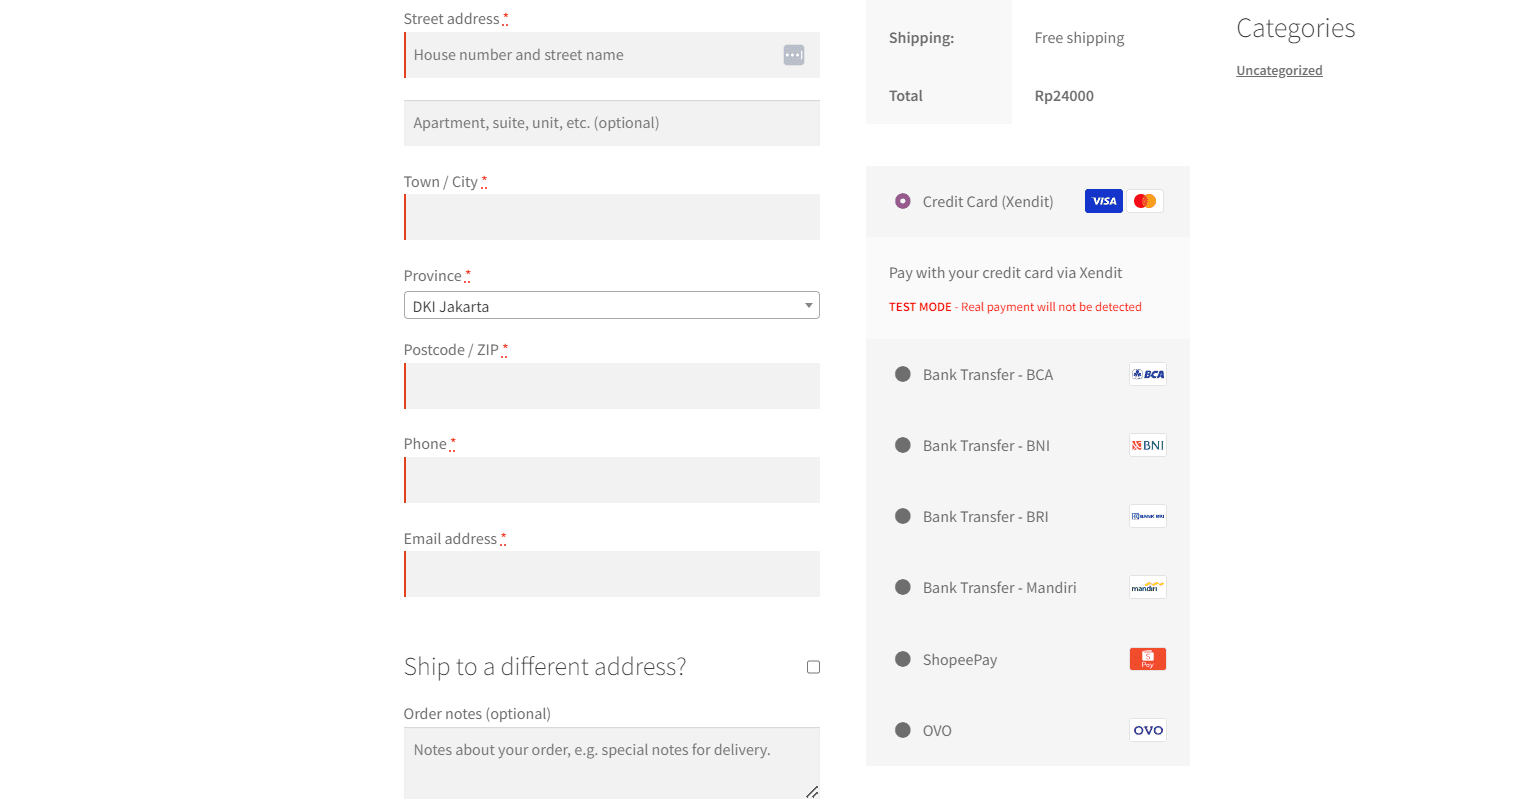
2. When you test checkout, you can already see Xendit payment methods on the checkout page
 Payment flow
.png?sv=2022-11-02&spr=https&st=2025-06-26T14%3A52%3A34Z&se=2025-06-26T15%3A04%3A34Z&sr=c&sp=r&sig=mh51JQkzyDtf%2B3I8PEhNXo8UYNqldrzIOYH4yrsBVyQ%3D)